I have spent some hours setting up a solution defined in the title of this article. I want to make clear that there are numerous ways of configuring this and there are numerous Kerberos/Windows Authentication configuration possibilities based on different SPNs, IE Zones, Application Pool identities, etc… This article is intended to provide 1 possible, unofficial, approach. I think that if someone can use this article to get a working proof of concept quickly, then changing or enhancing it to meet your specific needs would happen much faster. Consider this a baseline only for getting things rolling.
I assume you have a Windows Server with IIS 7+ installed and you have installed and configured WebDAV using the instructions here.
The remaining portion of this article focuses on 5 tasks:
- Creating a UNC File share for WebDAV to access and granting the appropriate access
- Mapping a Virtual Directory to a UNC share
- Configuring the Application Pool of the Application
- Creating the required SPNs
- Delegating authentication for the Application Pool Identity
UNC Configuration
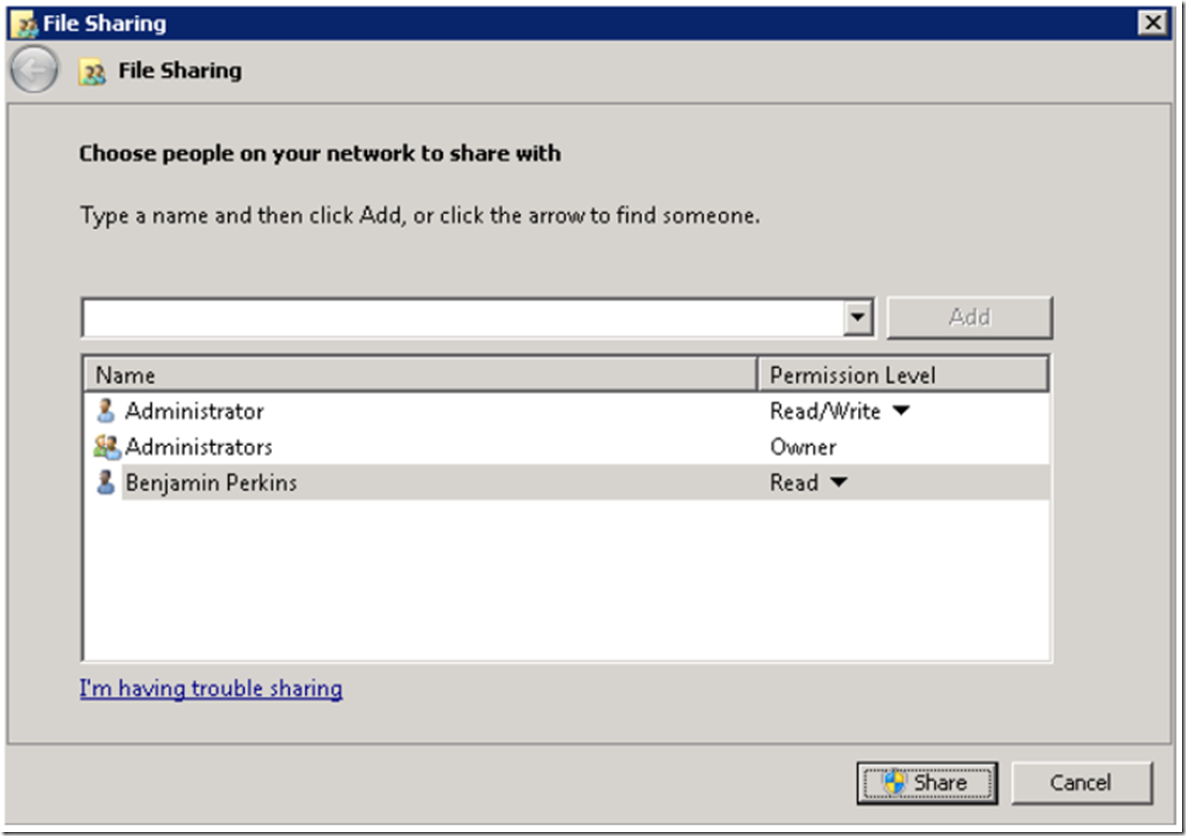
On your file share server, share the folder you wish to make accessible using WebDAV. For example in Figure 1 where I have granted Read/Write permission to the Administrator and Read permission to Benjamin Perkins.
Figure 1, Create a UNC share to use with WebDAV
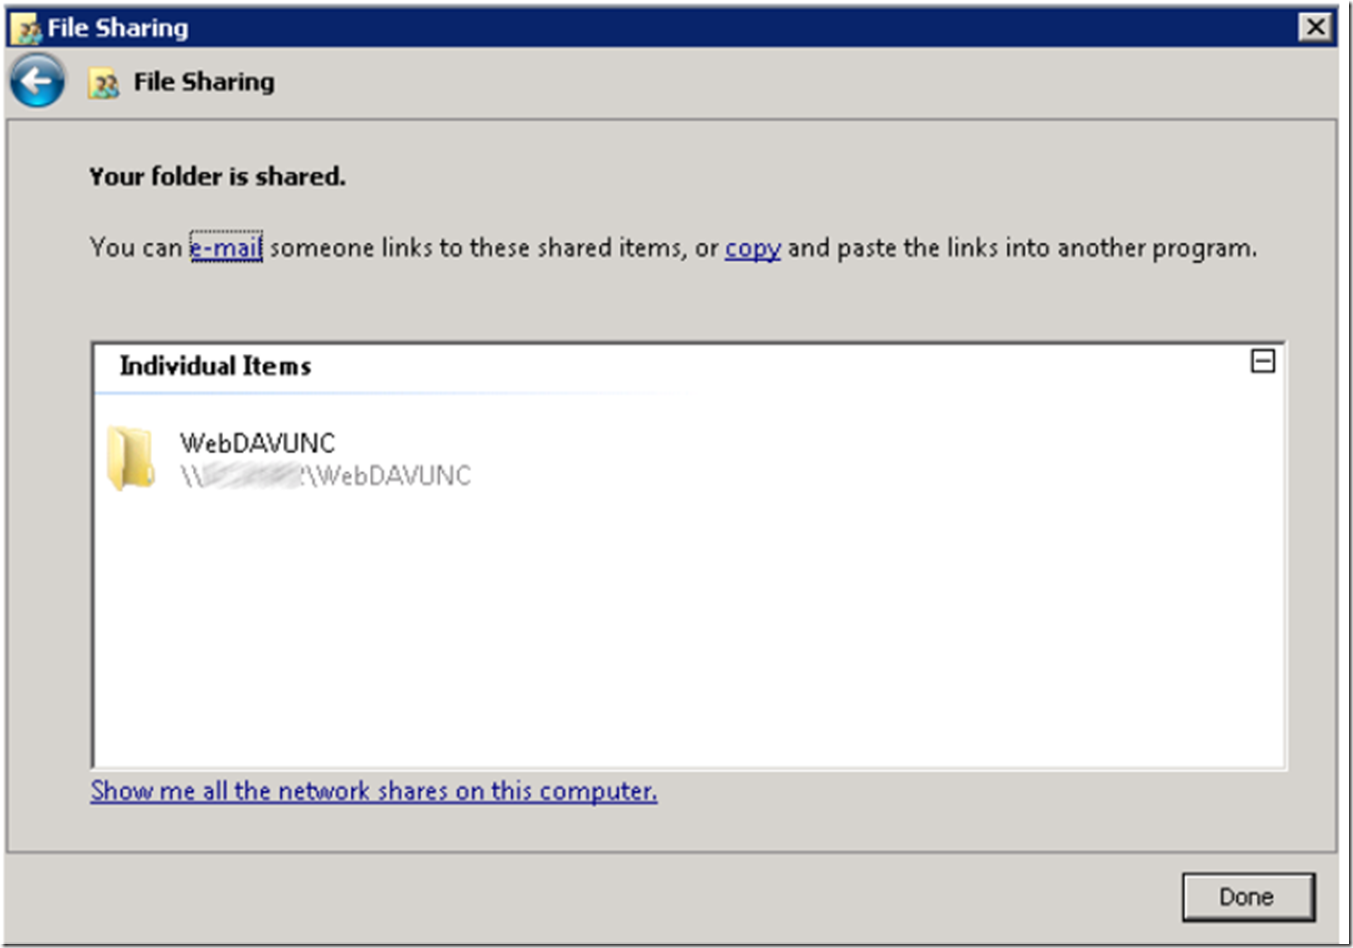
Click on the Share button and write down the name of the share rendered in a window similar to that shown in Figure 2.
Figure 2, the UNC share detail for use with WebDAV
Mapping a Virtual Directory to a UNC share
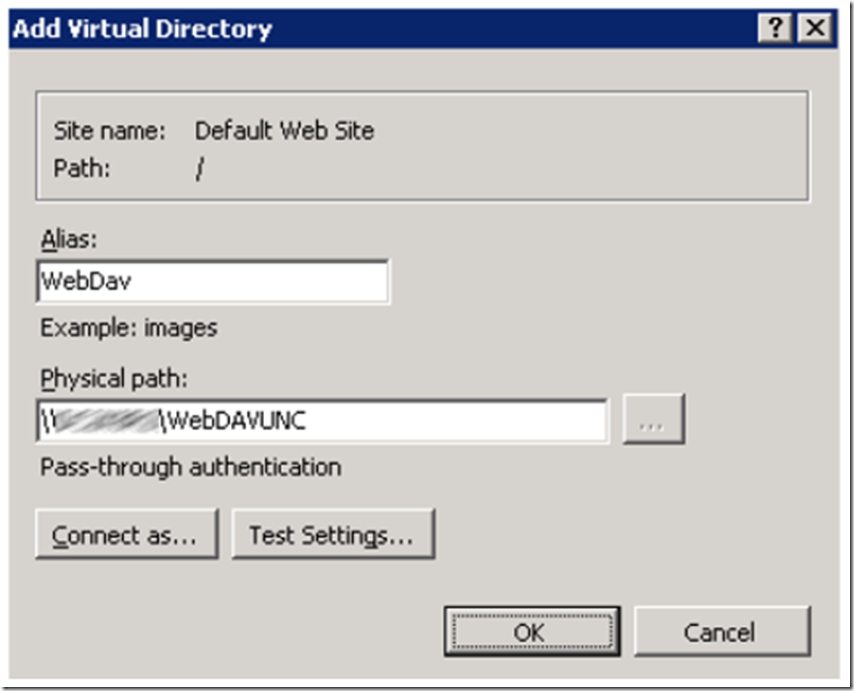
Login to your IIS server and create a new which points to the UNC share. Right-click on Default Web Site and select Add Virtual Directory. Enter the details similar to that shown in Figure 3, then select the OK button.
Figure 3, configuring a Virtual Directory for use with WebDAV and map to a UNC
The next step is to convert this Virtual Directory to an Application. The reason I do it this way is because if you try to map the UNC from an Application you are likely to get an error message. This error message might deter administrators from continuing or make them take unnecessary analysis steps. Convert the Virtual Directory to an Application by right-clicking on the WebDAV folder and selecting Convert to Application and then press the OK button.
NOTE: You will need to enable Windows Authentication and disable Anonymous Authentication.
Configuring the Application Pool of the Application
The reason for converting the Virtual Directory to an Application is so that we can associate a different application pool to the Application instead of using the DefaultAppPool that is used for the content of the rest of the Default Web Site.
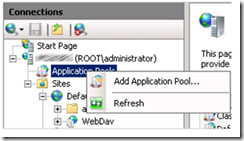
Create a new Application Pool by right-clicking on the Application Pools feature and then click the Add Application Pool… menu item as shown in Figure 4.
Figure 4, creating a new Application Pool for WebDAV
Name the Application Pool, for example, WebDAVUNC and leave all the other default settings as they are, excluding one. The default application pool identity is set to ApplicationPoolIdentity which we need to change to a domain account. To do this click on the WebDAVUNC which was just created and on the right-hand side of the IIS Management console in the Action pane, select the Advanced Settings… link. Once opened, click on the ApplicationPoolIdentity and the … button to open the windows illustrated in Figure 5.
Figure 5, Change the identity of the Application Pool
Select the Custom Account radio button, enter the credentials for the domain account and select the OK button and OK again and OK again…until you are back in the IIS Management console.
NOTE: Don’t forget to go back and change the Application to use this new Application Pool and set system.webServer/security/authentication/windowsAuthentication/useAppPoolCredentials to True.
Creating the required SPNs
I read some articles about SPNs and some say they are simple and other say they are complicated. I think the concept is conquerable, it just takes time and experience. There are enough SPN articles so the instructions are here just you setup the right one and not providing details about what it does and how it works.
What needs to happen is an SPN needs to be created for the identity of the Application Pool on the IIS server. I check to see what SPNs already exist for the root\administrator by executing the following command, the results are shown in Figure 6.
C:> SETSPN –L root\administrator
Figure 6, checking existing SPNs using SETSPN –L
Next, I add an SPN, using the following command, the results are shown in Figure 7. I have blurred out the IIS Server name, you need to add the name of the IIS server where you have previously installed and configured WebDAV.
C:> SETSPN –S HTTP/IISSERVERNAME root\administrator
Figure 7, SPN for WebDAV IIS UNC
You might want to create another SPN for the FQDN, however, in this case, the WebDAV instance will be accessed using http ://servername/WebDAVUNC and will contain no FDQN.
Delegating authentication for the Application Pool Identity
One last thing to do is to set the Application Pool identity properties to allow for Delegation. To do this access the Active Directory Users and Computers console and open the properties for the account. In this example the Administrator account is used. Click on the Delegation tab and click the Trust this user for delegation to and service (Kerberos only), as shown in Figure 8.
Figure 8, Figure 8, Application Pool delegation for UNC WebDAV configuration
Once selected, click the OK button and the IIS/WebDAV/UNC/Windows Authentication configuration should now be working. Let’s test it.
TIP: The Delegation tab will not be present unless there is an SPN created for the account already
Testing the IIS/WebDAV/UNC/Windows Authentication configuration
I like to first test and see if I have access using Internet Explorer, even though WebDAV is not used via IE. Open Internet Explorer and navigate the to the WebDAV installation, for example http: //YourIISServerWithWebDAV/WebDAVUNC
NOTE: If you browse the website from the IIS server itself, it will work because it would use NTLM instead of Kerberos. Test from a web client and not from an IE browser on the IIS server.
To test the WebDAV redirector by mapping a drive to WebDAV, open a command prompt and enter in the following command, the result is shown on Figure 9.
C:>NET USE * http: //IISServerName/WebDAVUNC
Figure 9, connecting to a WebDAV instance on IIS mapped to a file share using Windows Authentication
Open Windows Explorer and navigate to the Drive that was just mapped. Recall from Figure 1 where we granted permission to the share. When logged into the client as Benjamin Perkins, you will be able to Read the contents of the drive. However, if logged into the client as an Administrator, modifications are permitted. Test it out and see for yourself.


