There was a recent announcement of some new features on the Microsoft Azure App Service platform that supports the deployment of your new web site instance without impacting or changing the live web site.
This is a feature that has been available on the Cloud Service platform form most of its existence and is very helpful in the deployment of changes to your system.
In the past I have had a few web sites hosted by a domain provider which I deployed changes to via an FTP client. The deployment was straight to production from my client. This was a risky move and resulted in a high number of .BAK or .OLD files on my web site or some down time while I worked out the differences between my client and the server.
That is the old way now, forget about making your hosted environment messy and the risky deployment straight to production. With this new feature, you can deploy to a staging environment and once you are happy with it, you click a button and that environment becomes your primary environment.
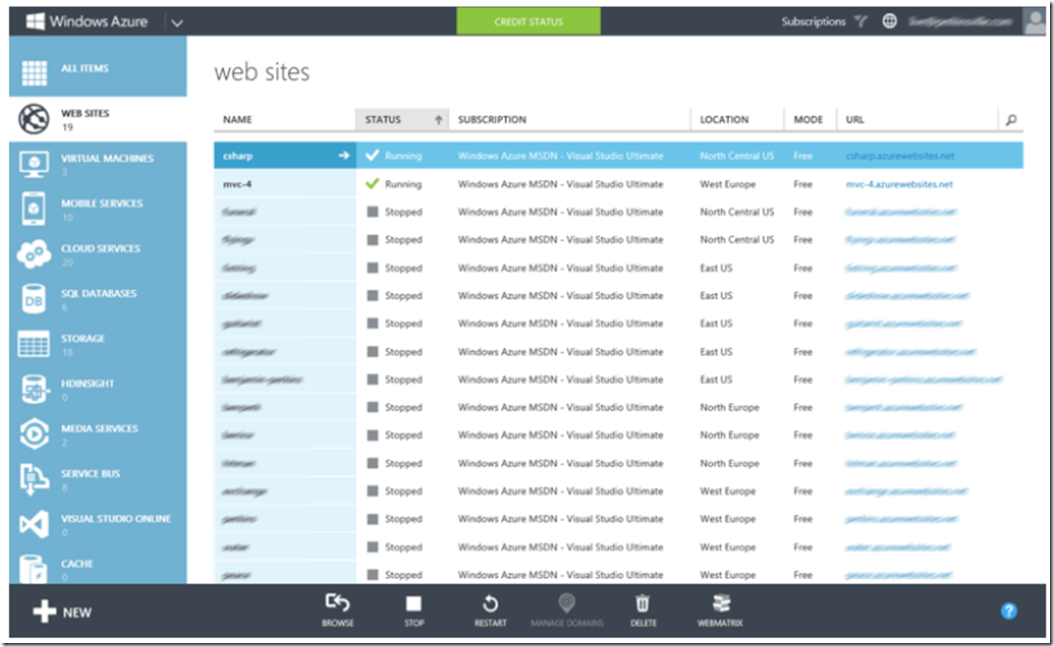
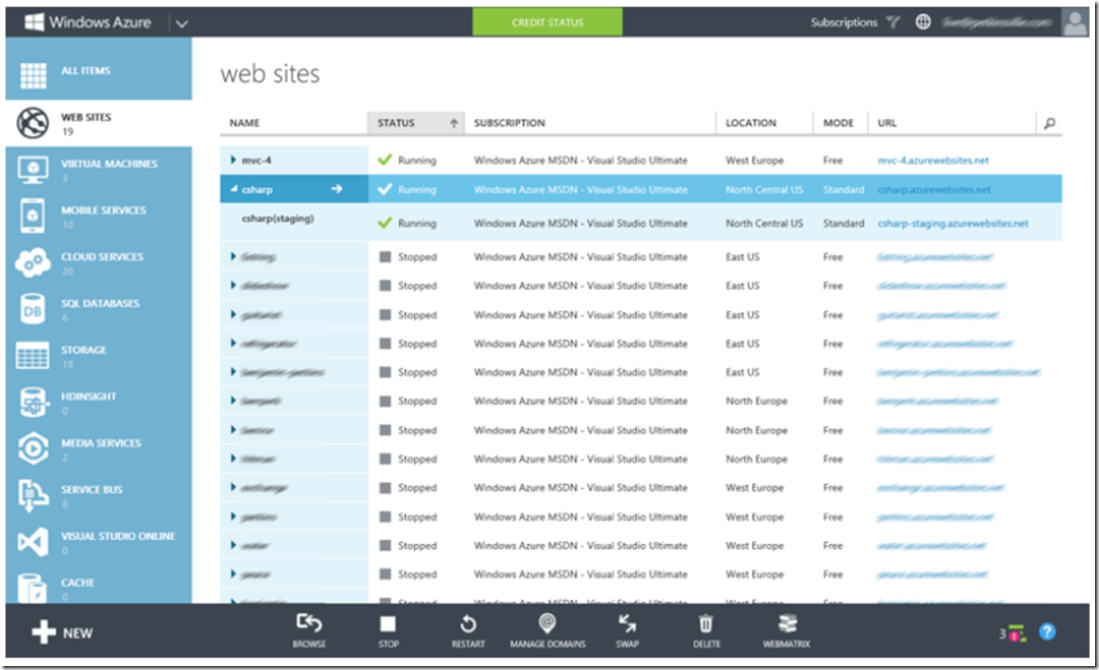
Although the original announcement explains and gives an example of how this is done, I like to do it myself, it’s the best way to learn, at least for me. Notice in Figure 1 that there is no arrow point shown next to the web site, once staging is enabled, you will see the arrow point, as shown in Figure 3 and can expand it to show the staging instance of the Microsoft Azure App Service.
Figure 1, Microsoft Azure App Service default, pre staging enablement
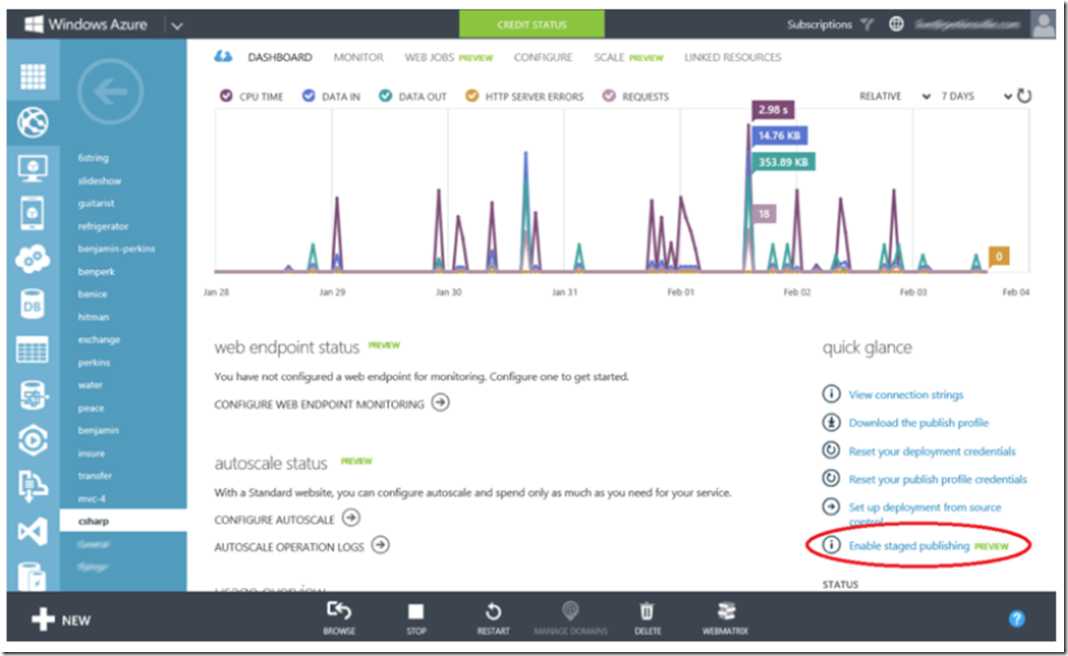
To enable staging, select the Microsoft Azure App Service, navigate to the DASHBOARD and select the Enable staged publishing, as shown in Figure 2.
Figure 2, Enable staging on Microsoft Azure App Service
If your Microsoft Azure App Service is not running in Standard mode you will be requested to upgrade to that mode before proceeding. Once you have enabled staging you will see the arrow points next to your Microsoft Azure App Service. Expand the one you just enabled staging for and you will see the web site where you can stage new versions of your web site prior to deployment.
Figure 3, Enabled and expanded staging on Microsoft Azure App Service
Configure, connection and deploy to the Microsoft Azure App Service, just like you would any live/production instance. The only visible difference is the URL now includes “–staging” after the original web site name. There are also some features not currently available with this feature like SCALE and LINKED RESOURCES.
Because I generally use FileZilla to deploy my files to my Microsoft Azure App Service, nothing changes other than the FTP address. My deployment is as simple as a onetime configuration of the client and then FTP the files to web site and give it a quick test.
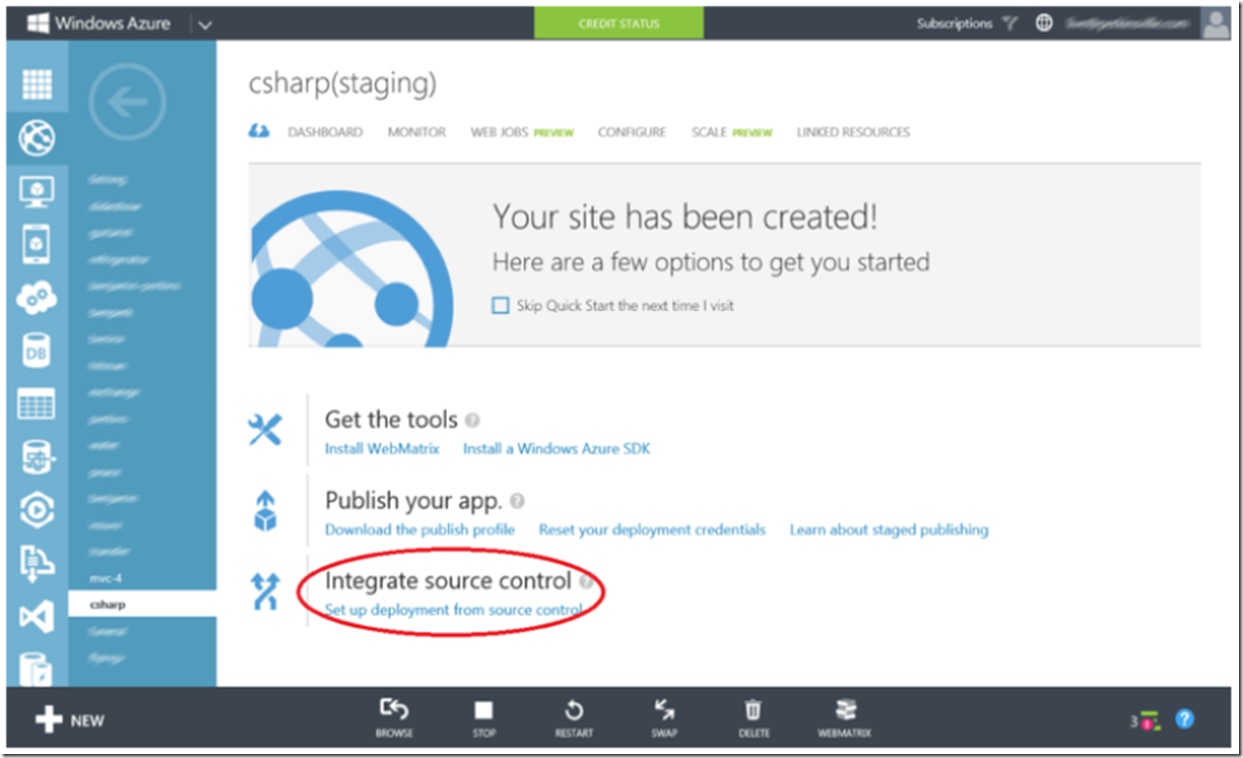
Publishing using the web deploy features in Visual Studio is also supported as well as the plethora of other source code repositories accessible and configurable from the Integrate source control link shown in Figure 4.
Figure 4, Deployment options for staging on Microsoft Azure App Service
Once you have deployed and tested your new version on the staging environment, simply click on the SWAP button to change the current content to mimic that currently hosted on the staging instance. Some settings will be migrated from staging to the primary instance like connection string, handler mappings, etc…however endpoints, SSL bindings, etc… will not be changed. Simply click the SWAP button and Azure immediately makes your staging environment the live one.
As an extra value add, the live content which you just replaced is now hosted on the staging instance of your web site. This is very valuable if there is some kind of issue. You can roll back the changes and repoint to the original site by selecting the SWAP button again and saving the configuration. This is very nice and will reduce downtime and/or issues.
This is a valuable feature which will help you increase availability and negative impact of a deployment.


