Before I get started, keep in mind, that I am not a security expert, if you want to enable security for your Azure App Service Web App I recommend using EasyAuth as described here, so much easier, IMO. You likely get some benefits from the ‘Change Authentication’ features of:
- No Authentication
- Individual User Accounts
- Work and School Account (which is what I discuss here)
- Cloud – Single Organization
- Cloud – Multiple Organizations
- On-Premises
- Windows Authentication
Nonetheless, let’s walk through how I configured Work and School Account OWIN authentication into an ASP.NET MVC application I hosted on Azure. The steps required are:
- Create an Azure Active Directory
- Create the ASP.NET MVC application in Visual Studio 2015
- Add Reply URL to the Azure Active Directory settings
NOTE: there was one place that threw me for a loop, literally. When I got everything configured, when I tried accessing the Web App, it would just loop around to the authentication page or hang. Long story short, use HTTPS! I discuss this more later. You can configure HTTPS only on your Web App so that publishing and remote debugging works. I describe how to do that here.
Check out my other post if you have a chance as well: How (I) connected a console application to a Web API protected by an Azure Active Directory.
Let’s get started.
Create an Azure Active Directory
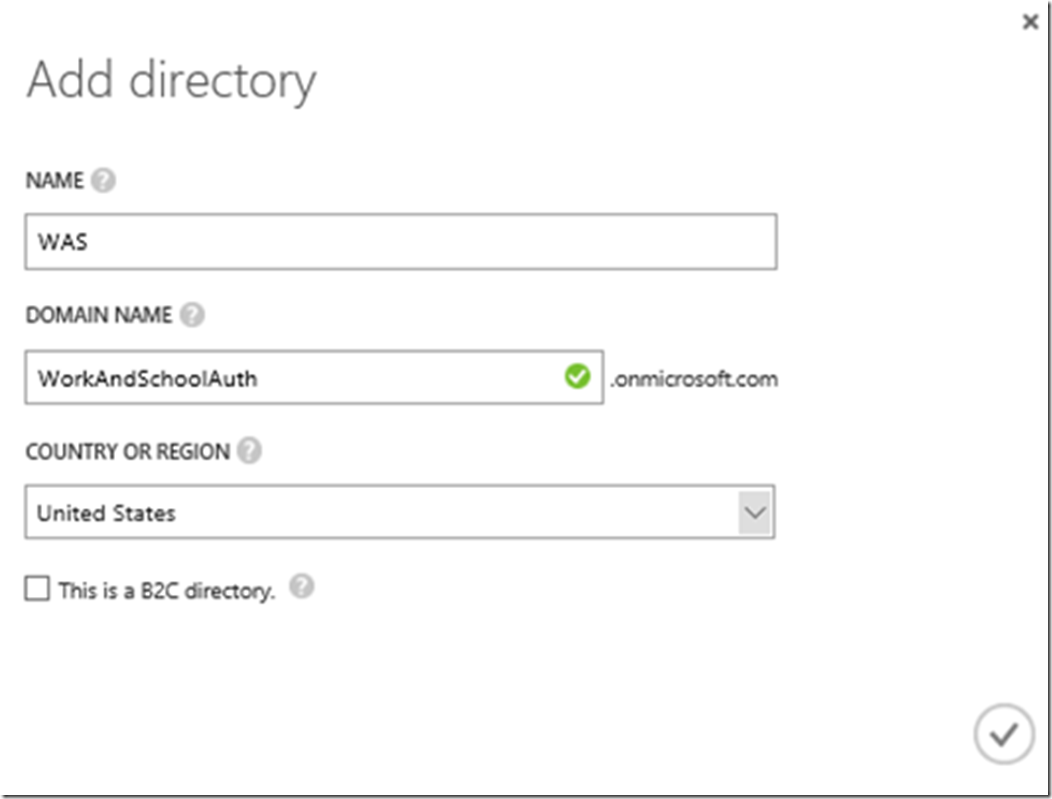
This can only be done in the AUX portal here. Click on the +NEW button then App Service –> Active Directory –> Directory –> Custom Create. Create the Active Directory by entering in details similar to that show in Figure 1.
Figure 1, Create an Azure Active Directory for Work and School or OWIN authentication
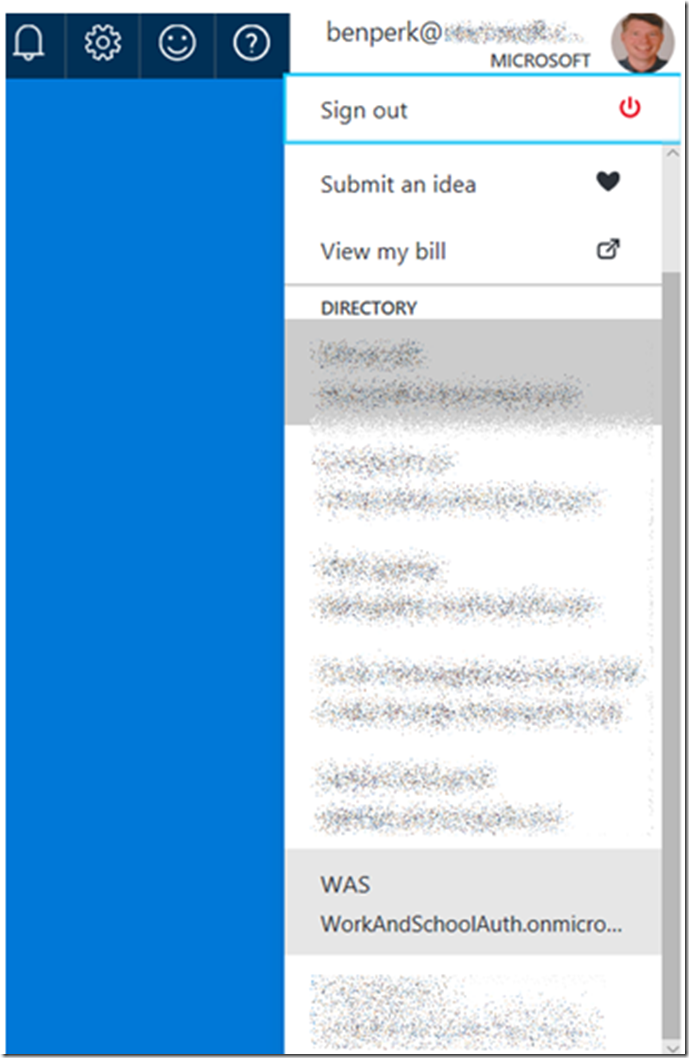
Once it is created, LOG OUT (don’t just close the browser) out of the AUX portal and LOGIN to the new portal here. You need to login / log out to see the new AAD, similar to that in Figure 2.
Figure 2, OWIN in ASP.NET MVC for App Service
That’s it for now, move on and create the ASP.NET MVC application in Visual Studio 2015.
Create the ASP.NET MVC application in Visual Studio 2015
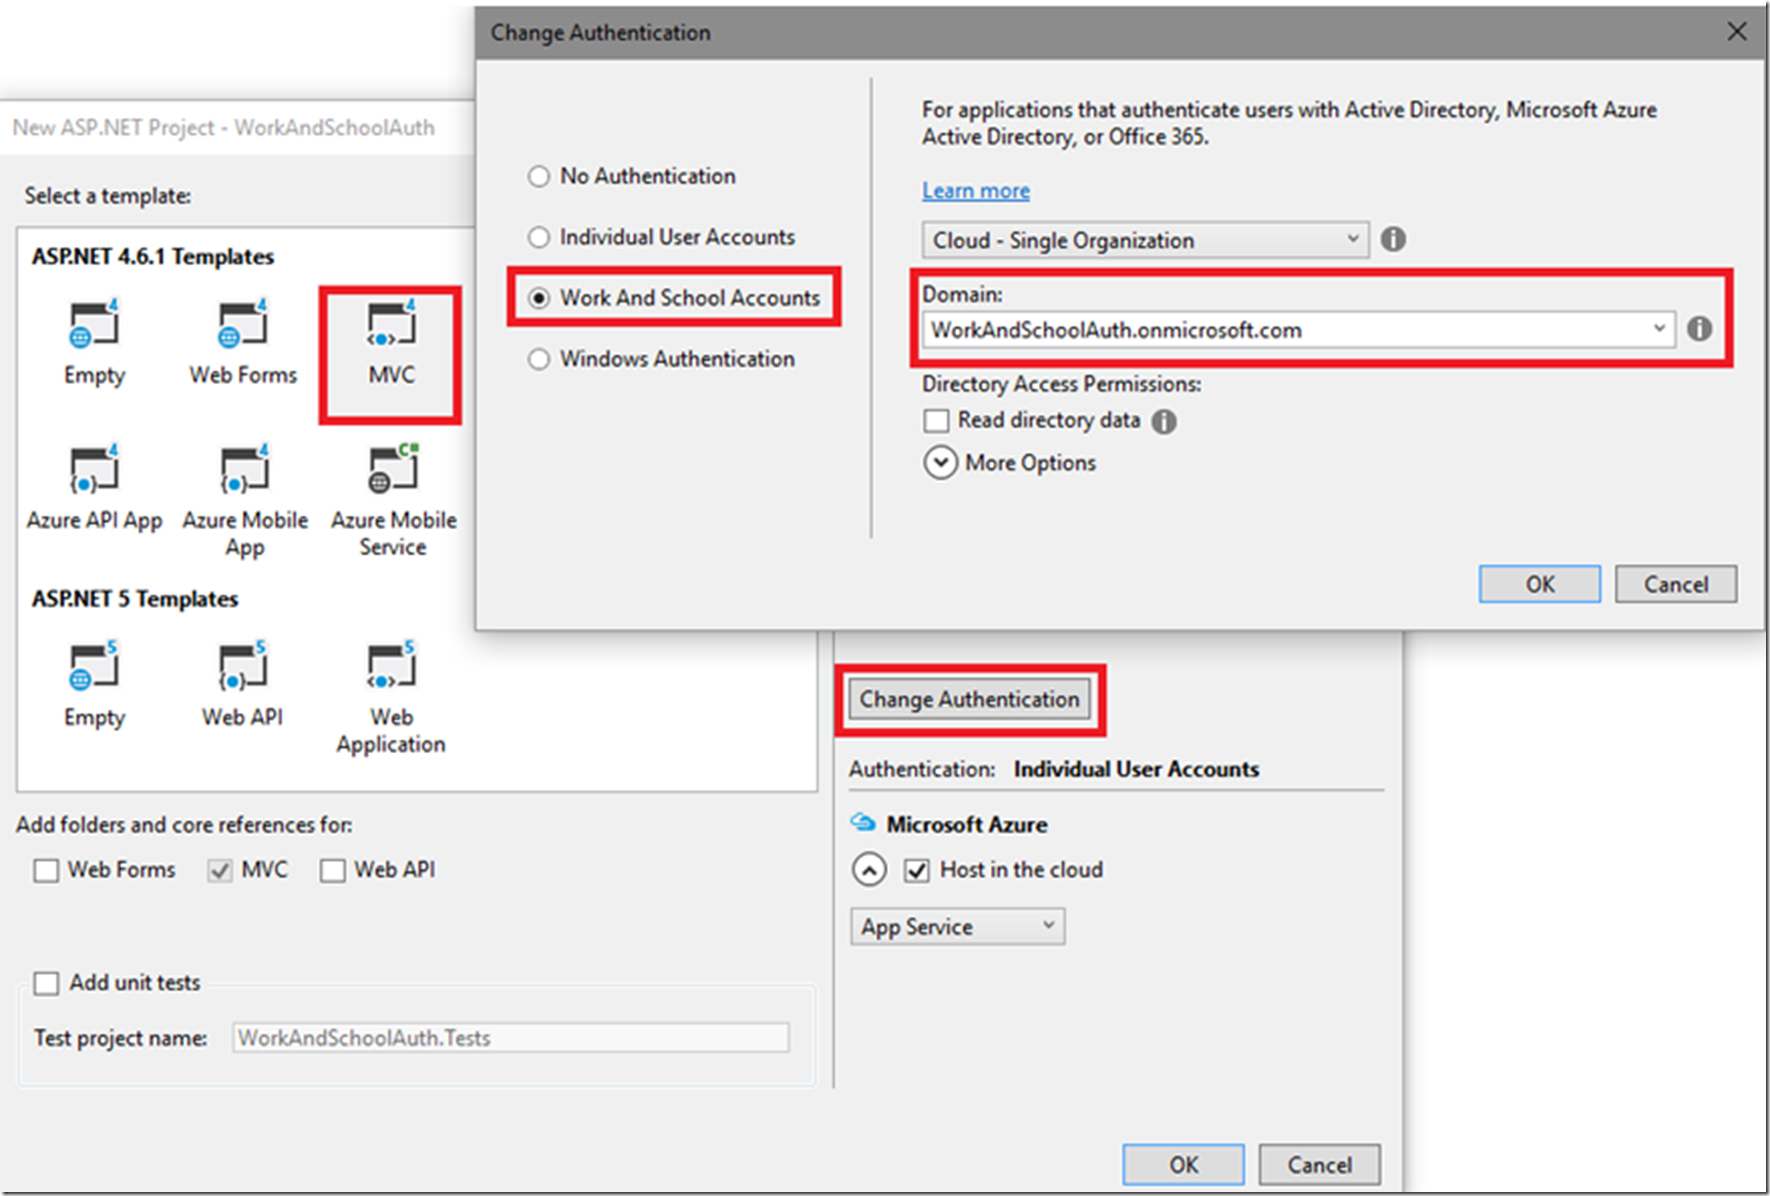
Create the ASP.NET MVC application as shown in Figure 2. If the domain you just created doesn’t show up in the drop-down, add it manually. Click the OK button 2 times.
Figure 3, configure the Azure Active Directory with the OWIN base ASP.NET MVC application with Work and School
As I selected ‘Host in the cloud’ as seen in Figure 3, I am prompted next to created the Web App. I recommend creating it, but it would also be possible to skip that and create/deploy the Web App later.
One of the things that really threw me here was that I immediately published the Web App which resulted in 2 strange, and unnecessary troubleshooting activities
- ida:PostLogoutRedirectUri
- Infinite loop during authentication, Hang after deployment, ASP.NET MVC OWIN
Here is what I experienced and what I did wrong in both cases.
ida:PostLogoutRedirectUri
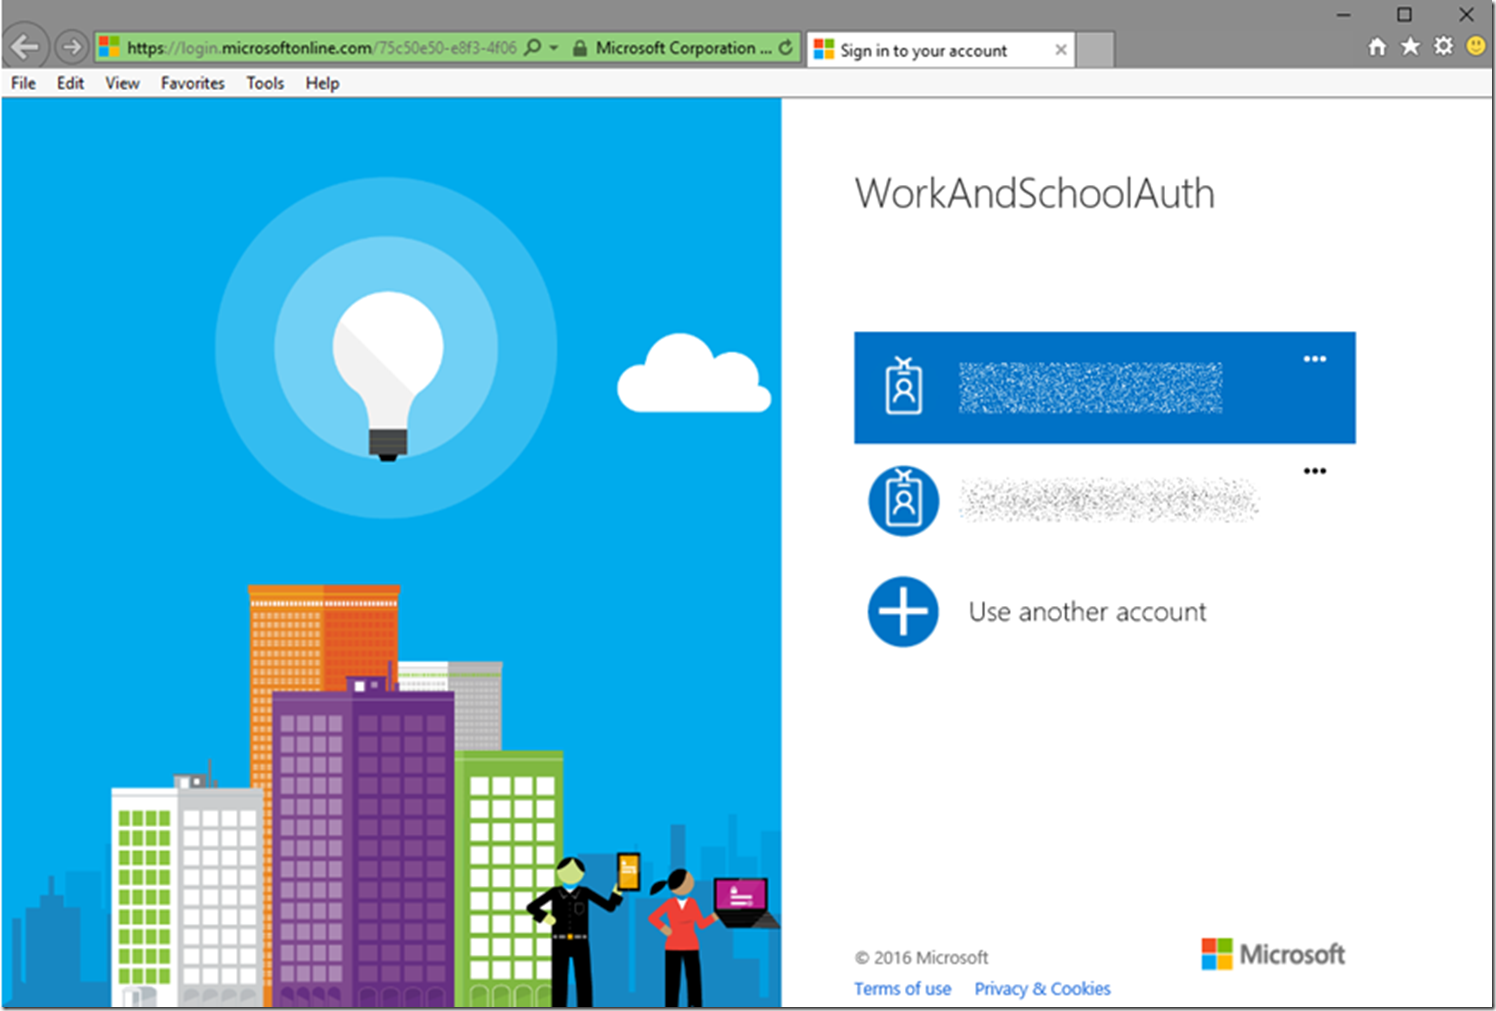
Like I said, I published the Web App immediately and that opened the browser which tried to authenticate me against the Azure Web App, similar to that shown in Figure 4.
Figure 4, accessing an Azure Web App with OWIN
Next another page asking to granted the permission to sign me in and read my profile, was rendered and I accepted. Then, BAM!!!!! I get this shown in Figure 5. Why am I being redirected to LOCALHOST?
Figure 5, why am I redirected to LOCALHOST PostLogoutRedirectUri OWIN
I looked everywhere and found that this was in the web.config file as an Application Setting key value (<add key=”ida:PostLogoutRedirectUri” value=https :// localhost:4433*/ />), so I started playing with it, searching for some clues and nothing.
After a long time I thought I would run it locally in Debug mode from Visual Studio and that worked, made sense, but how to get it to work on my Azure Web App.
Add Reply URL to the Azure Active Directory settings
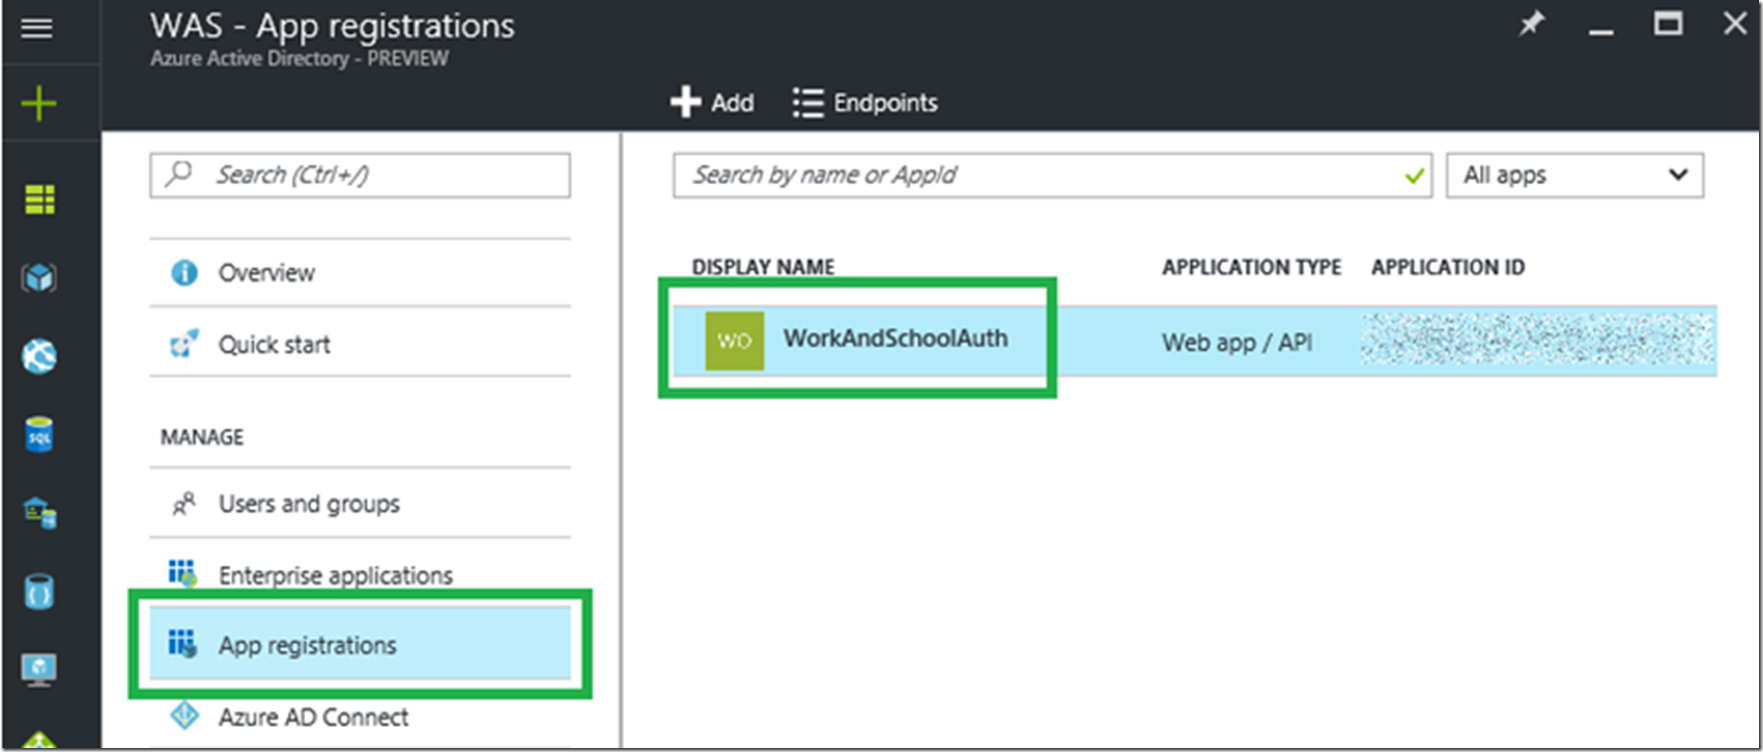
Answer, add the URL to your Web App to the Reply URLS via the Settings menu in the Azure portal, as shown in Figure 6. Make sure it is HTTPS.
Figure 6, Web App with OWN redirects to LOCALHOST
Figure 7, Web App with OWN redirects to LOCALHOST
Then when I published, it just hung or after logging out, I could see that it was redirecting and looping. Which leads me to my next section.
Infinite loop during OWIN authentication, Hang after deployment, ASP.NET MVC OWIN
Short answer, #1 HTTPS is required, #2 when the deployment is complete you are redirected to the HTTP URL of the Web App.
So just close down the browser after deployment and access the site using HTTPS.
If you access your Web App with HTTP it will just hang or loop after you click on which credential you use, similar to that shown previously in Figure 4.
Also check here for a know issue. (#Katana, #UseCookieAuthentication, #CookieAuthenticationOptions, #SystemWebCookieManager, #ICookieManager)
Conclusion
Pretty easy to make the configuration, it just took some time and there was not much information posted about this. So here it is.
